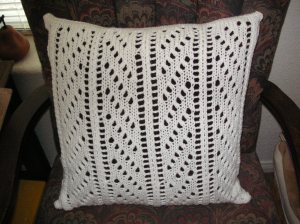
Make a tension swatch to find your rows/stitches per inch and ideal tension for the yarn you choose
Choose a lace punch card; I chose one that only had 2 rows of transfers between the 2 rows of knitting but any lace card will work
- RC000
- Cast on your project with the main yarn and knit a row or two ending with Carriage on Left (COL)
- Change Knob to KC to engage timing belt
- K 1 row to right to select needles
- Release punch card
- *Push both Part buttons in
- Pull up Row Counter Tripper
- Hand transfer the selected needles with a one prong transfer tool to the left (you will always transfer the stitches in the direction the carriage will go next)
- Pull all needles into working position
- Knit 1 row to the left
- Hand transfer selected stitches to the right
- Put all needles into working position
- Continue to work the hand transfers like this until you take the carriage across and it does not select any needles
- Put Row Counter Tripper down
- Remove part buttons
- K 2 rows stockinette* -(the needles will select on the last pass of stockinette to begin the process again)
- Repeat * to * until you have the length you desire
- I do not remove the yarn from the carriage, but do snug up the yarn a bit in the tension mast to knit the 2 stockinette rows
It seems like a lot of steps to hand do the lace, but you get into a rhythm and it takes the guess work out of the transfers when the selected needles tell you which stitches to transfer.
You may copy, print and use any of the info on my blog. Please do not copy and repost anywhere on the internet without contacting me to get my permission. Please do not sell this pattern as your own. Thank you, Ann
