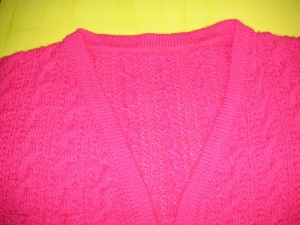
Sandwich Bands for cardigan front edges and back neck; encloses edges if a cut and sew

Same yarn as garment, Tension : 2 – 3 tighter than garment
- Decide number of N needed by holding the edge of front or neck up to bed
- With WY, K 10 R – COL
- 1 R ravel cord – COR
- Change to main yarn
- K 12 – 16 R (even # of R – depends on how wide you want the band to be) COR
- K 1 R loose (t 9 or 10) for turning row – COL
- Tension back to starting T
- K another 12 – 16 R – COL
- Cover N bed with folded over paper towel to keep oil off garment
- Cut a narrow strip the length of work of blue painters tape and put it over the top of the gate pegs so knitting does not catch on them
- Lay garment right side up with edge to hang along edge of N bed
- Poke N through edge approx. ¼ inch below edge (or zig zagged stitches with cut & sew) by hanging end stiches, then center stitches, then fill in rest of N
- Push picked up row behind latches
- Rehang first row of stitches off ravel cord into latches – enclosing the cut and sew edge
- Push all N to HP and remove WY
- Remove yarn from carriage
- Starting at the left – Hand knit each stitch and push clear back to out of work position to make a large stitch (or if a shorter st is desired, lay a dowel across bed and push N butts to the dowel)
- Reach under paper towel to move needle butts to knit each stitch with left hand
- Put the yarn into hook of each needle with the right hand
- To ensure each N knits properly, close latch after laying yarn in it before pulling it back
- Cut yarn, leaving a 6 inch tail at right side
- Lift the garment up and over the gate pegs towards you – making sure nothing is caught on the gate pegs
- Check to make sure every stitch knitted
- Beginning at left side, do a loop through a loop bind off
- Draw the 6 inch tail through the last stitch
- If the band is done in sections (back, L front, R front) mattress stitch the edges together to join the band
- One side of front band can have button holes made in if desired
- You may copy, print and use any of the info on my blog. Please do not copy and repost anywhere on the internet without contacting me to get my permission. Thank you, Ann
- Ann Huppert (GrammaAnn)